|
Scanning Head
________________________________________________________________________________________________________
The scanning head involves a motor to move a head back and forth in a barrel or bucket. This is a very low cost moving prop; you may want to make a couple of them. This project will be showing how to build a moving head in a small barrel. The size of you container could be different and the amount of material you need may change a little. The dimensions for this project work with only this size barrel and your dimensions may very.
Construction
1. Container about 16 inches high and 10 inches wide
2. 5/16 diameter threaded rod 2 feet long
3. 3 nuts to fit the threaded rod and two 5/16 locking nuts and 3 large washers
4. 1 foot of steel bar with holes pre drilled that fit the threaded rod and bolts
5. 1 disco ball motor or a motor of same kind around 4 RPM
6. 2 feet of 1 X 3 wood and a scrap piece of 1/4 inch plywood that is 5 inch square
7. 1 motor arbor to fit the shaft of the motor (picture on right of what a motor arbor looks like)  8. A scrap piece of sheet metal about 1 inch square 8. A scrap piece of sheet metal about 1 inch square
9. Two 5/16 inch bolt that are 1 inch long
10. Some 1 inch long wood screws
11. Hot glue gun
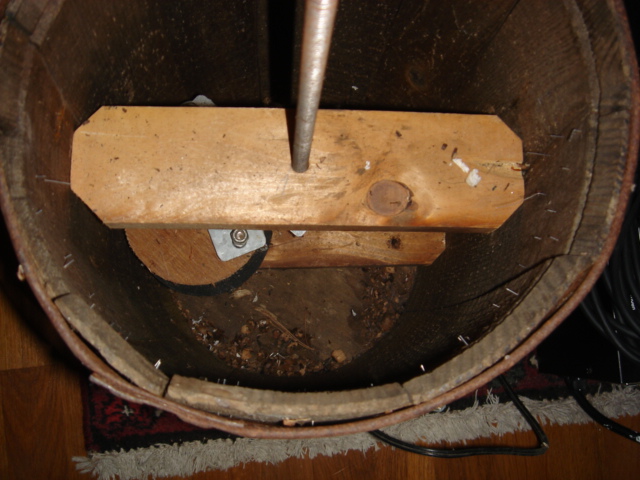 To start this project cut two pieces of 2 X 1 that are 9 7/8 inches long. This will keep the threaded rod centered in the barrel. The four corners on the pieces of you should cut off. This is because the barrel is round and corners will make the wood to tight to fit. Next drill a hole that is 5/16 inch in the center of both pieces of wood. This will be for the rod to fit through. To start this project cut two pieces of 2 X 1 that are 9 7/8 inches long. This will keep the threaded rod centered in the barrel. The four corners on the pieces of you should cut off. This is because the barrel is round and corners will make the wood to tight to fit. Next drill a hole that is 5/16 inch in the center of both pieces of wood. This will be for the rod to fit through.
Take a piece of scrap metal and hot glue it to the bottom of the barrel in the center. When the threaded rod is sitting on the bottom of the barrel the scrap piece of metal will reduce the friction and keep the rod from drilling a hole eventually through your barrel.
Next take the disco ball motor and the motor arbor and tighten it to the shaft of the motor. You can find motor arbors at a industrial supply company or maybe at your local hardware store. Check out my links page for some industrial supply companies. Take a scrap piece of ¼ inch wood and cut out a 4 inch diameter circle. You also need to drill a 1/4 inch hole in the center of that wood circle or the same size as the shaft with the screw and washes that come with the motor arbor. The best thing to do when cutting out the circle is to use a hole saw attachment to your drill. This way you get a center hole already. Now drill a 5/16 inch hole close to the edge of the wood circle. Attach this wood circle to the arbor and tighten it down.
Next take the first piece of 2 X 1 that has hole in it and screw it 4 inches up from the bottom of the barrel. This will support the bottom of the threaded rod and will act as a shelf for the motor to sit on.
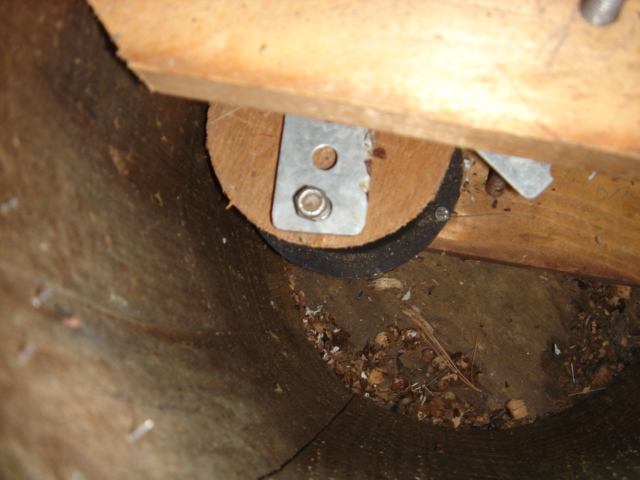 Take two pieces of steel flat bar that has the holes in it and cut two pieces that are 4 1/2 inches long. You should grind the corners of the flat bars to get rid of the sharpness. Next take one of the metal bars and attach it to the hole near the edge on the wood wheel using a 5/16 inch bolt two washers, a regular nut and locking nut. Put the bolt through the hole on the wood wheel then the regular nut and tighten down then a washer then the metal bar on top then another washer and then the locking nut. Do not tighten the locking nut down all the way keep the flat bar louse so it can move freely. Take two pieces of steel flat bar that has the holes in it and cut two pieces that are 4 1/2 inches long. You should grind the corners of the flat bars to get rid of the sharpness. Next take one of the metal bars and attach it to the hole near the edge on the wood wheel using a 5/16 inch bolt two washers, a regular nut and locking nut. Put the bolt through the hole on the wood wheel then the regular nut and tighten down then a washer then the metal bar on top then another washer and then the locking nut. Do not tighten the locking nut down all the way keep the flat bar louse so it can move freely.
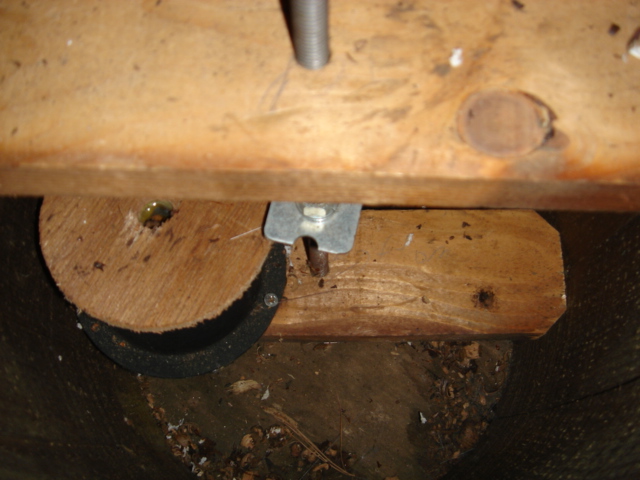
Next take the 2 foot threaded rod and screw a nut on the it about 8 inches in from one side. Take the other piece of flat bar and slide it on to the rod. Take another nut and screw that on top of the flat bar. Now there should be a nut on each side of the flat bar and do not tighten the nuts up against the flat bar yet. This is because we have not put in the motor yet and this flat bar needs to line up with the motor.
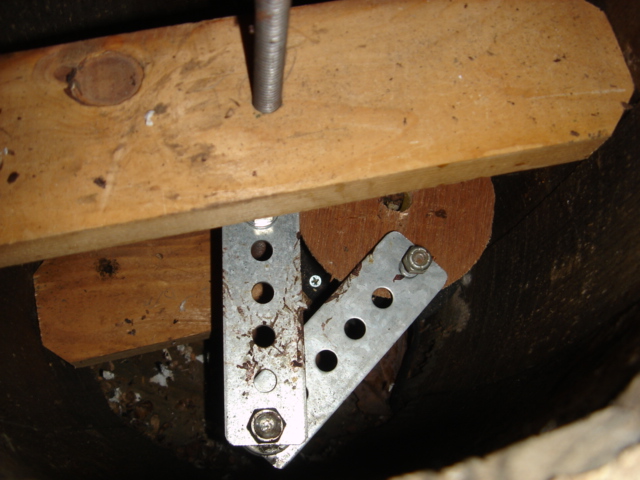 Place the motor on the piece of wood that you are using as a shelf. Move the motor as close as you can to the wall of the barrel with out any part of the motor touching the wall then screw the motor into the wood using some wood screws. Also go ahead and drill a hole in the back of the container for the plug to come out of. Place the motor on the piece of wood that you are using as a shelf. Move the motor as close as you can to the wall of the barrel with out any part of the motor touching the wall then screw the motor into the wood using some wood screws. Also go ahead and drill a hole in the back of the container for the plug to come out of.
Next you need to level the piece of metal bar attached to the threaded rod so it is inline with the metal bar attached to the wood. You will be connecting these two metal bars to from a linkage between the motor and rod. Once you have lined up the bar on the threaded rod tighten it down with the two nuts. Then with another 5/16 inch bolt, two washers and a locking nut connect the two metal bars together provided by the holes that are already drilled in the bar. Do not tighten down the locking nut. You want the linkage to move freely.
Take the second piece of wood that has the drilled hole in it and slide it on the rod 6 inches down from the top of the barrel. Secure in place with some screws. This will support the top half of the threaded rod.
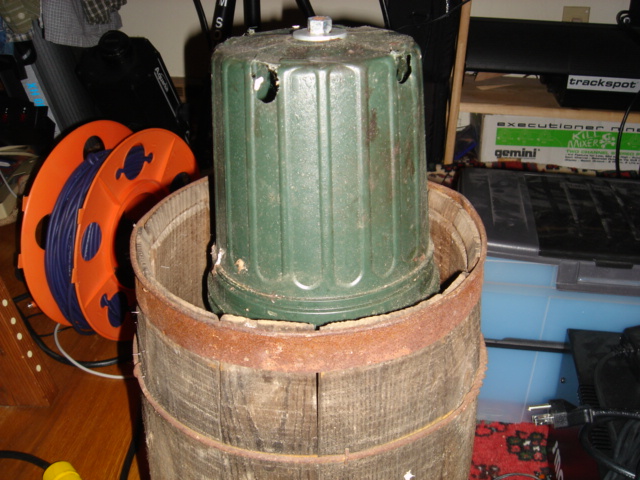 Next you can add a mask filled with newspaper and stick it on to the rod. You can also take an empty plant container that is about the size of a persons head and attach it to the rod using some nuts. Just slip the mask over the plant container and this acts like a skull for the mask. Next you can add a mask filled with newspaper and stick it on to the rod. You can also take an empty plant container that is about the size of a persons head and attach it to the rod using some nuts. Just slip the mask over the plant container and this acts like a skull for the mask.
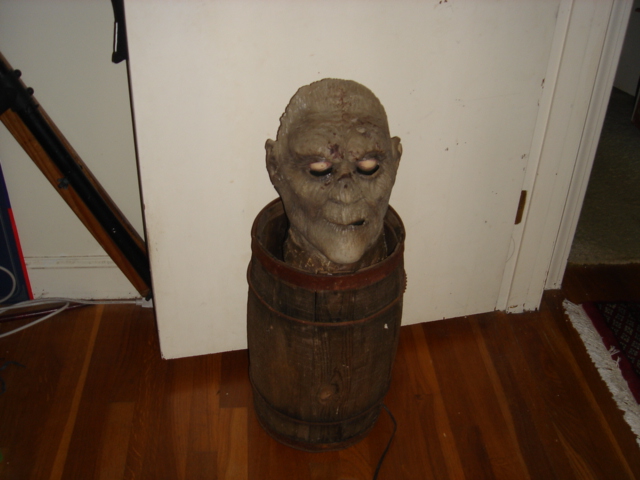 Right now should be finishing up with the project and you may need to do some adjustments with the head and the linkage to get it working correctly. Right now should be finishing up with the project and you may need to do some adjustments with the head and the linkage to get it working correctly.
|